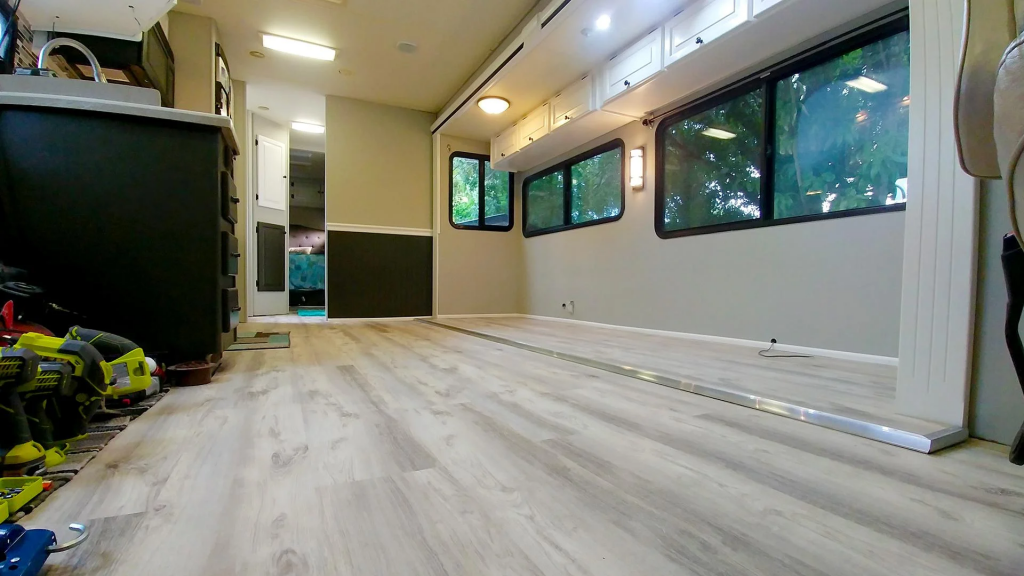
RV remodelling is not always an easy task, but it will be worth the while if done right. There are several factors to keep in mind when planning a renovation. For example, what you need, whether you want to install RV windows, add accessories, furniture, or add or remove components inside the RV because all of these affect the plan on what you decide to do going further.
Whether it is to upgrade the interiors or add hints of trendy elements, the one thing you cannot miss is the flooring. As camper vans or RVs are designed for travelling and act as a mobile home, the flooring should be aesthetically pleasing, durable, and functional to accommodate a comfortable interior. It is the foundation of any interior designing plan and is the most used part of the RV. Thus, we wanted to discuss a few tips that will help you get a clearer picture of how to remodel and replace the flooring inside the RV effectively.
Identify The Need For Replacement or Upgrade
The first thing to assess and finalise is the current state of your existing flooring or carpet and determine if it requires replacement and why? There may be various points to consider before actually moving on to the upgrading process. From stains, wear and tear, foul smells, allergic reactions or simply the desire for a new look. Determine the factors that come into play and plan out the necessities you require from your new flooring. Identifying the major factors and what needs to be changed will also help you determine if you need to replace the existing flooring wholly or partially.
Plan The Budget
Before making decisions on remodelling or choosing suitable materials, one needs to consider the cost factor. The process is either budget-friendly or expensive, depending on the choices you make. So, it is essential to map out the exact numbers that you want to stay within and plan the whole endeavour accordingly.
Choose the Right Type of Flooring
The next tip we can give you is to choose the right type of flooring material. You can opt for many materials, depending on your exact requirements, preference, and needs. Again, there are plenty of options, including vinyl, hardwood, carpets, ceramic tiles, laminates and more. When making the decision, keep all the costs, requirements, measurements and flexibility in mind to ensure you make the right choice. So for a better understanding, here are the specifications for each type of floorings.
RV carpets are the most commonly used flooring materials and are the preferred choice for many RV owners. Versatile, cost-effective and easy to install, these carpets are the easiest choice. In addition, carpets can add an insulating effect to the RV while also adding an extra layer of padding for comfort. However, it is not an ideal choice for the long run as these easily collect dirt, debris and are likely to deteriorate over time. However, regular upgrades and remodelling will allow you to maintain the appearance of the RV and help you stay on top of trends as well.
Vinyl flooring is another commonly preferred alternative thanks to the affordability, ease of use and versatility. It comes in squares with adhesives in the back of them for easy installation. In addition, you can find a vast range of variations in colour, textures, fabrics, sizes, and finishes. The flexibility ensures that you find what you are looking for when it comes to the aesthetics it offers. It is also waterproof and is ideal for preventing moisture and water damages.
Hardwood flooring is another classic choice for RV carpet replacement. Easy to clean, durable, and aesthetically pleasing, it is one of the expensive options. However, it requires minimal maintenance and lasts a long time even after years of use, so it offers long-term value. On the contrary, these types of floorings are pretty heavy and might affect the efficiency of the overall vehicle, so it is not exactly a great choice for those travelling often.
Laminated floors are also another option for those looking for a wood-like finish but for a more affordable price. These floorings are ideal for individuals looking for lightweight and easy to install alternatives to replace the carpet in RVs. It can withstand a lot of damage and will last a long time as well. In addition, its floating design does not adhere to the floor and instead lays atop the underlay. This design also allows options to add insulations and padding for extra comfort purposes.
Ceramic tile floorings are a great alternative to natural stones as it resembles similar features and textures. It can look like marbles or granite for a fraction of the same amount with lower maintenance requirements. In addition, it can withstand higher levels of heat exposure and does not absorb moisture like other materials. This feature prevents the flooring from future leaks and weather damage that might result in additional repair costs.
Measurement is Key
One of the significant elements when replacing the flooring in an RV is to get the correct measurement. Once you identify the space that needs the carpet replacement, it is easier to determine the requirements. If your RV features a slide-out or two, keep these spaces in mind as well. Take proper precautions to measure all around the cabinets and complex areas to determine the exact numbers. In addition, the exact specifications will ensure the flooring is ideal in size and snug-fitting.
Prep the Application Site
Before replacing the carpet in the RV, start by prepping the application site appropriately. Start by emptying the space and removing all the RV furniture and accessories that might be holding the old carpet in place. It includes any removable parts of the RV like the pedestal seats, sofas, consoles, swivel seat base, and others usually screwed in place. You can then easily remove the existing carpet along with the staples, adhesives, any chemical remains, carpet paddings or anything that might come in the way of installing the new RV flooring. Also, check for soft spots under the RV’s floorboards that may indicate plumbing or leak issues. Prepping the site beforehand allows a better outcome, smoother finish, and perfectly levelled surface area.
Rebuild the RV Flooring before Committing
Once all the planning and preparation is complete, you can move on to the installation process for the new RV flooring. However, before committing to the placement of the materials, it is a good idea to rebuild the floor beforehand. Then, put the pieces in place and check for any loose ends or additional requirements. Another thing to keep in mind is the air vents or heating outlets to avoid restricting any existing RV functionality.
Depending on the material you choose, the installation process varies. Make sure you have the proper knowledge and follow the exact procedure as instructed. Seal any loose ends, and check the fit of the materials to ensure a snug and tight fit.
Prepping to Replace Slide-In Flooring
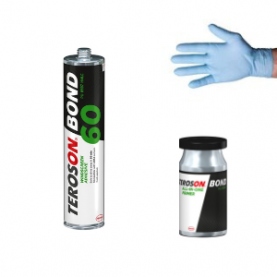
Like all the other sections, the slide-in area also requires proper prepping to ensure a snug and perfect fit. Start by raising the slide-in area slightly to remove all the existing carpeting and the bonding agent used. This process might take longer than you intended and can be hectic. However, once you get the hang of it, it is easier. One tip we have is to paint the underside of the RV slide to ensure there are no loose ends that stick out like a sore thumb. Using chemical-resistant nitrile gloves is highly prescribed for this process, as they provide excellent protection against paints and organic solvents. Especially when one prefers to add the flooring without any underlay, the section underneath might just peek and look weird or unfinished.
RV Slide Out Carpet Replacement
Depending on the make and model of your RVs, it may or may not feature an RV slide-out; room-extenders that add to the interior space when required. This space is mechanized and usually opens when the RV is stationary and closes when it is in motion. So when replacing, ensure the new RV slide-out carpet replacement does not restrict this movement. To avoid this, make sure the floorings are the right size and ready to install. Use the spacers along the edge and leave enough room for expansion and contraction. Another tip here is to trim off excess edges to add more stability and better finishing.
And this concludes our article on tips to replace flooring inside the RV effectively. Changing the flooring is a great way to update the interior and upgrade the RV’s overall outlook and performance. It might not always be a cost-effective choice, but it will be worth it if you successfully pull it off. While we recommend our readers get professional help if required, these tips will help you along the process if you decide to do it yourself.
OUR LATEST BLOGS
READ THE LATEST FROM EMPRISE GLOBAL FOR GUIDES & TIPS